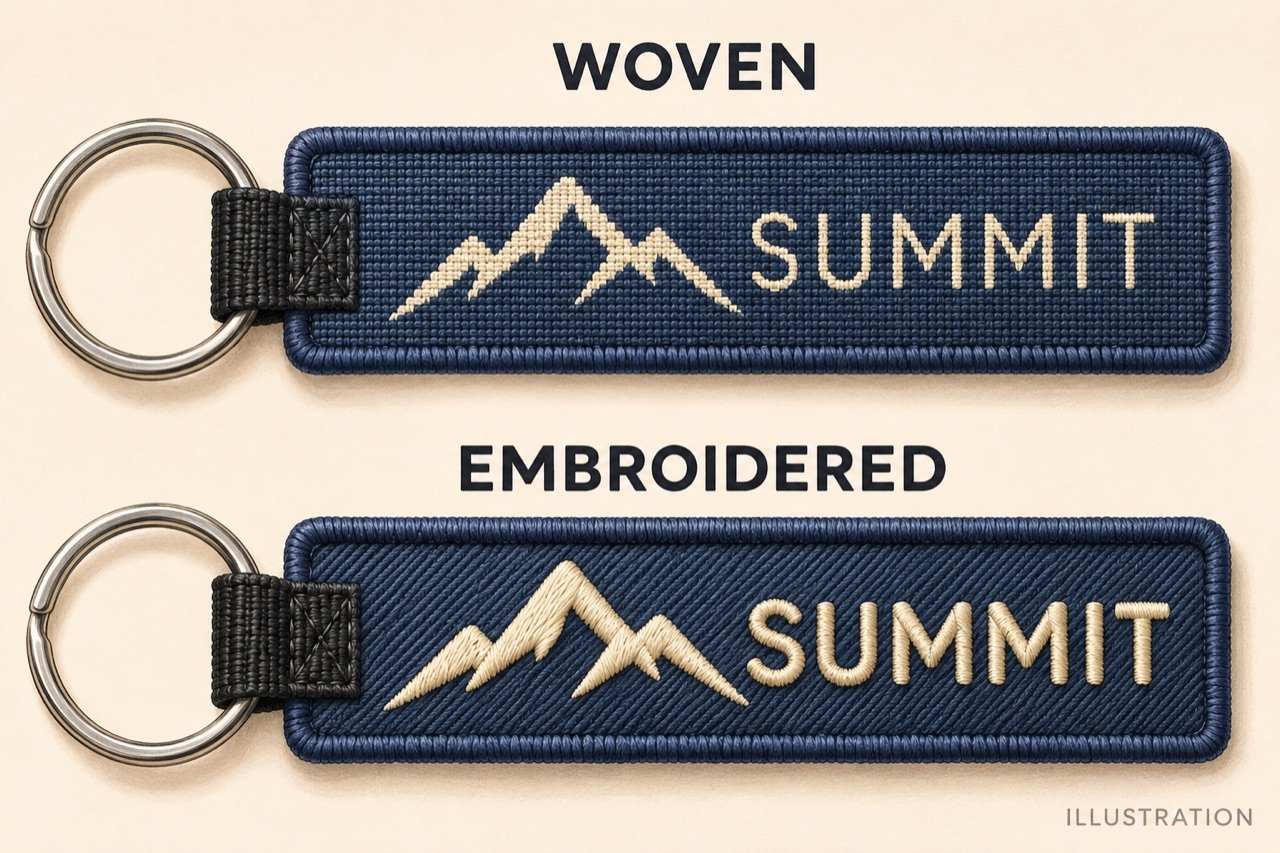
Two embroidered patches can use the same logo, dimensions and colours and still look different. On one, the logo sits on a smooth navy twill background. On the other, the navy background is stitched too, so you can see the direction of the threads across the whole face. Decide which look you want before asking the factory for a quote.
A quick way to start is to mark the areas that must be embroidered, then circle any areas where the base fabric should stay visible. The factory can use that marked artwork to propose a coverage level and show you what it includes.
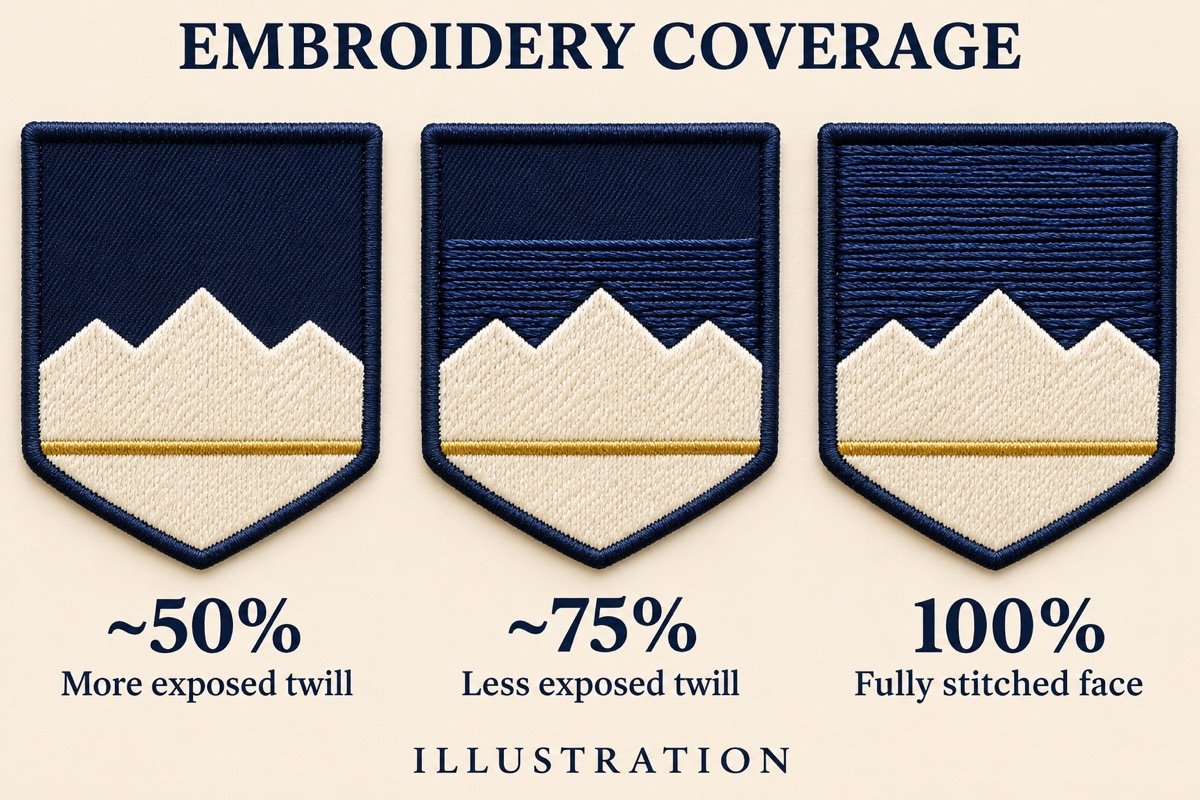
AI-generated illustration of the same patch at three coverage levels. The partial-coverage percentages are approximate.
What does embroidery coverage measure?
Embroidery coverage describes how much of the patch face is covered by stitching. If about a quarter of the face shows the base fabric, coverage is about 75%. When stitching covers the whole face and the base fabric is no longer visible from the front, the patch has full coverage. Emblemtek’s coverage definition
Imagine a rectangular patch with a face area of 2,400 mm² inside its border. If the stitched areas total 1,800 mm² and the remaining 600 mm² show twill, the coverage inside the border is about 75%. This example uses the face inside the border as the measuring area. Ask your supplier which area it includes in its estimate, particularly if the patch has a wide border or an irregular outline.
Coverage tells you how much area is stitched. Stitch density describes how closely stitches are spaced within a stitched area. Two patches can have the same coverage and still differ in stitch count, texture and how they feel in hand.
Compare the same logo at 50%, 75% and 100%
Picture a shield patch with a white mountain, a gold stripe and a dark navy background. Keep the finished size, border, backing and colours the same so the coverage is the main change you are comparing.
| Coverage example |
What changes on the shield |
When to sample it |
| About 50% |
Stitch the mountain and stripe. Leave larger areas of navy twill visible. |
The logo has simple shapes and you want the twill to form part of the design. |
| About 75% |
Stitch the main artwork and fill selected navy panels. Leave twill visible in the remaining areas. |
You want more stitch texture while keeping some contrast between the stitched and fabric surfaces. |
| Full coverage |
Stitch the mountain, stripe and the whole background. |
The design calls for a stitched texture across the entire face. |
These examples describe three versions of the same design. The actual percentage depends on the area the chosen shapes occupy. For a small patch, compare the smallest lettering at its finished size. Ask the supplier to make it on the proposed background so you can see the contrast and read it in normal light.
Compare quotes using the same coverage map
Ask for two versions of the same artwork at the same quantity if you are choosing between exposed twill and a stitched background. Keep the finished dimensions, border, backing and packaging consistent. Have the supplier mark any change needed to produce each version and price the versions separately.
Adding fill usually means more stitching in the new areas. The final quote also depends on the artwork, size, order quantity and other specifications. A higher percentage alone does not tell you the price difference. See the custom embroidered patch cost guide for the other items to compare.
Please quote the attached 70 × 55 mm shield patch in two versions at 500 pieces each. In Version A, leave the navy areas marked “EXPOSED TWILL” unstitched. In Version B, fill those same areas with navy thread. Keep the finished size, border, backing and packaging the same. Please mark the stitched and exposed areas on each proof and list the unit price and sampling charge separately.
The sizes and quantities above are an example. Replace them with your order details. If the patch will be mounted on clothing, include the fabric composition, stretch, placement and whether it goes onto the panel before assembly or onto the finished garment.
Approve the coverage on a finished sample
Set the sample on the intended garment. In normal light, check that exposed fabric looks intentional, that the stitched background has the texture you approved and that the smallest line can be read. Look at the face from an angle to see how the stitch direction changes its appearance. Check the outer dimensions and whether the patch lies flat with the selected backing.
Keep the approved artwork revision, the coverage map, thread and fabric colour references, and the sample ID together. Use the embroidered patch sample approval checklist to record the rest of the inspection.
Frequently asked questions
Will 100% coverage make the logo easier to read?
Check the physical sample. Contrast, letter size, spacing and how the lettering is stitched all affect readability. A stitched background changes the surface behind the letters, so compare it with exposed twill when the smallest line matters.
Can I use the same logo for partial and full coverage?
Yes. Start with the same artwork and have the factory prepare a version for each background. Check the finished samples before choosing.
How do I ask Heyang to compare both options?
Send the marked artwork, finished size, quantity per design and intended placement. Use Request a Quote on the custom embroidered patches product page.